This page is the high-level overview of the features available on the Pro Edition Digital Dash.
Configuring the Pro Edition Digital Dash should be fairly simple after going thru these instructions.
There is always ongoing development. Features will most likely be added. This page will update at that time.
Accessing the Configuration Screen is done on any layout by touching in the area around the GREEN LOCATING DOT (outlined in yellow in the example below). There is a touch sensitive area in that location. EACH LAYOUT will have a GREEN LOCATING DOT notifying you where to press in order to access the Configuration Screen. See example below which is the “CarMoto” layout.
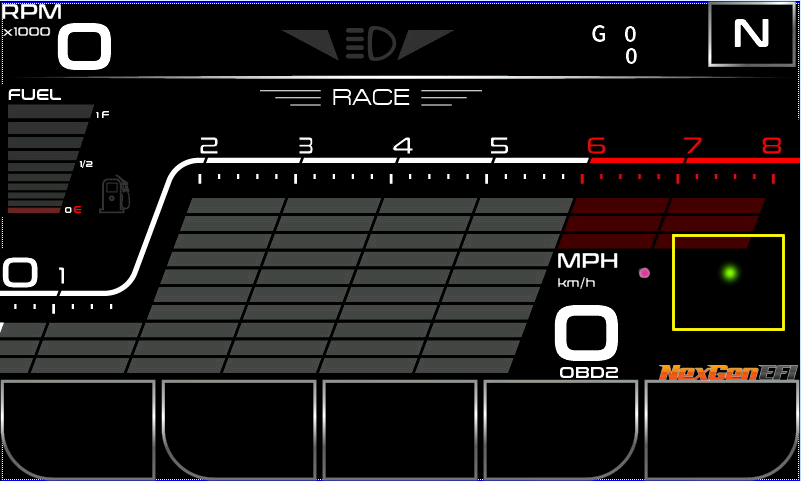
Once you touch in the area shown by the YELLOW box above, you should see the Configuration Screen below.

Gauges-
- Configures the 5 User Defined gauges on standard layouts and also the 9 User Defined gauges on Race layouts.
- Fuel Sender calibration
- Speed calculation via Bluetooth GPS, VSS, NexGPS Android Mobile App, NexGPS 20hz Hardware
- GPS ID / Pair code
Visuals-
- Layout selection
- Screen and LED brightness for Day and Night-time driving
Warning Lights-
- You can configure limits to various data points, eg: Shift light, Boost, AFR. The value will turn YELLOW if it trips based on your settings.
General-
- NexLINK WiFi Update, enable/disable. Used to turn on hotspot mode which enables you to connect wirelessly direct to the NexLINK for updating firmware.
- NexGPS WiFi Updating enable/disable to enable hotspot mode which enables you to connect wirelessly direct to the NexGPS* hardware to update firmware.
- NexNODE* to enable and disable NexNODE hardware and to configure it.
- Data format changes the unit of measure displayed. Eg: Pressure is by default PSI. You can change it to kPa. Some values will not change. Eg. If an EFI system has a datapoint “Lambda”, it will not be converted and will be displayed as Lambda
- Delete Config resets the display to default settings
- View Firmware type and version installed on the NexLINK.
* Hardware available as a separate purchase.
Sensors-
Each EFI system, well so far, has “Generic sensors”. Some have quite a few, some have just a few. This is where you configure it. More later on the page.
LEDs-
The center 5 LEDs are configurable by the end user to come on at a pre-defined value.
- External LEDs – flips the order of the 5 user configurable LEDs. See LED configuration page.
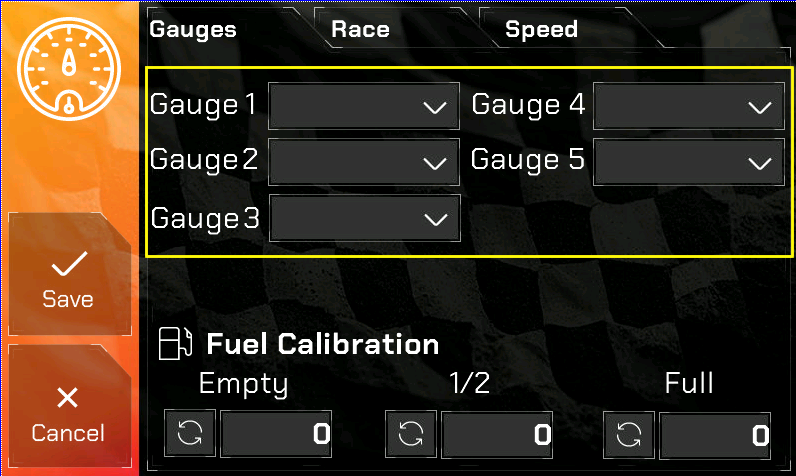
Gauges tab
For MOST of the layouts you will have an option to select specific data from the CAN BUS data stream your EFI system provides. Not all data is shown in the select boxes. If you would like specific data, please EMAIL NexGenEFI so we can update your software with that data you require.
Each gauge will need to have a UNIQUE value. In other words, you cannot have 2 gauges with the BAT label for example. The layouts as of this writing are designed for 5 User Defined gauges. You can “turn one off” by selecting HIDE from the select box.
Fuel Calibration is where you will configure the NexLINK to pull data from your fuel sending unit. RESISTANCE ONLY! NOT POWER! Please read the documentation on how to configure.
Once complete, you press the SAVE button and the Pro Edition will restart, displaying the data you selected.
Race tab sends you to the Race Gauge configuration.
Speed tab enables reading the speed of the vehicle from a Bluetooth GPS receiver, VSS (from the ECU), NexGPS (Mobile app for Android), NexGPSHW (20hz NexGPS external add-on).
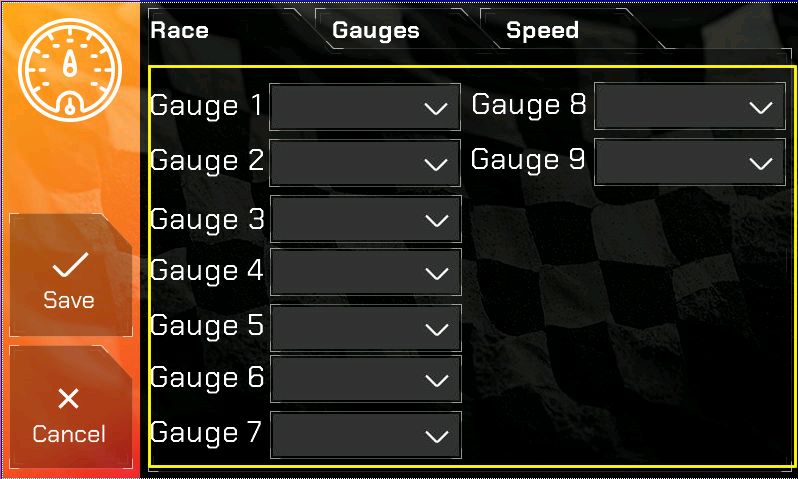
Race tab
There are “Race” layouts which has the RPM, MPH as default along with fuel.
The End User can select 9 various datapoints to display by pressing on the combobox and selecting it.
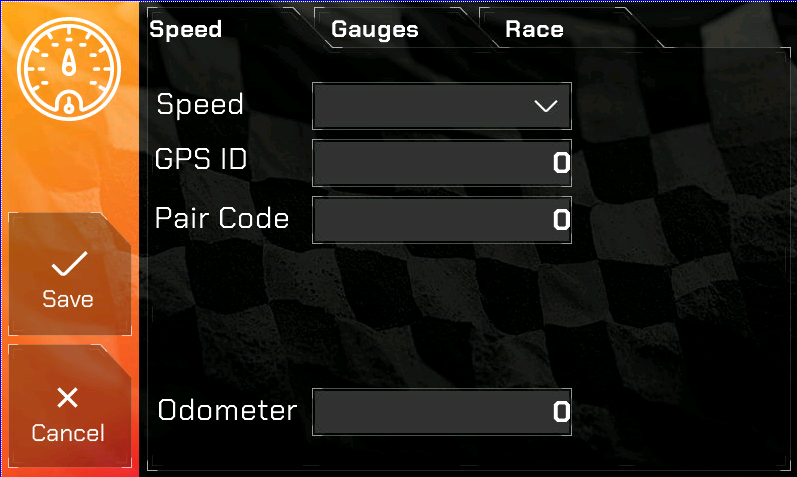
Speed tab
Speed enables reading the speed of the vehicle from a Bluetooth GPS receiver, VSS (from the ECU), NexGPS (Mobile app for Android), NexGPSHW (20hz NexGPS external add-on).
GPS ID is the Bluetooth ID of a Bluetooth Receiver you wish to use. Currently the QStarz 818XT 10hz and the Garmin GLO 2 has been tested. You are free to try others but I suggest one that is at least 10hz for faster updates. You will need to type in the Bluetooth ID of the Bluetooth GPS receiver in this box.
Pair Code is the pairing code for the Bluetooth GPS Receiver. Should be in the documentation from the manufacturer. Usually 0000 or 1234.
Odometer is the current mileage. If using Bluetooth GPS, VSS or NexGPS hardware- Works mathematically by calculating various points in your journey. If using NexGPS Android Mobile app, the app calculates the odometer and sends it to the NexLINK.
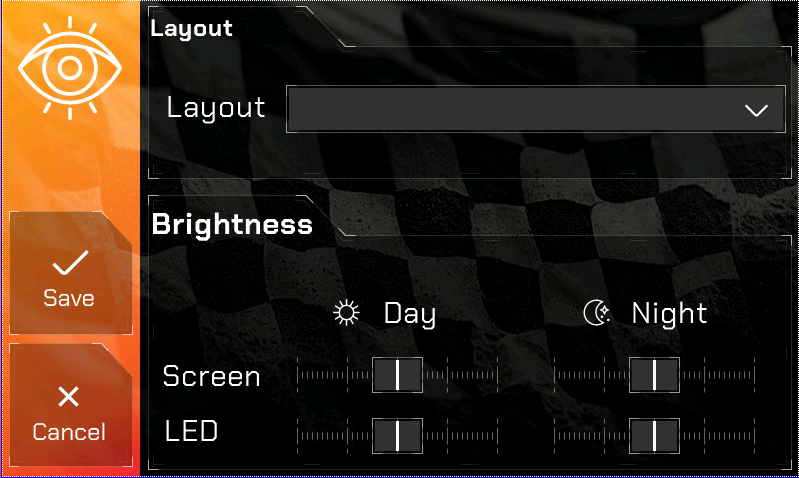
Layout
Pre-defined layouts which are selectable.
Brightness
Adjust brightness for the screen and LED lights for Day/Night-time driving.
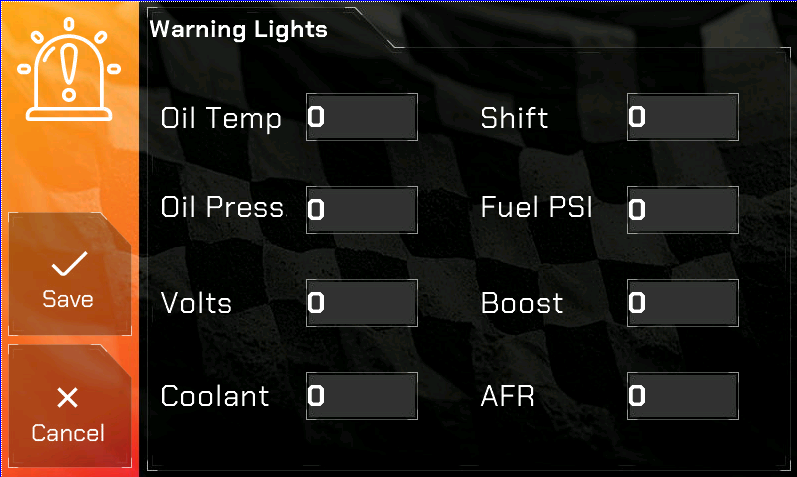
Warning Lights
This area configures various warning lights and features of the Pro Edition series.
Oil Temp – enter a value you wish to be warned if it is HIGHER than the entered value. example: 215. When Oil Temp is HIGHER than 215, the Oil Temp warning light will illuminate.
Oil Press – enter a value you wish to be warned if it is LOWER than the entered value. example: 20. When Oil Pressure is LOWER than 215, the Oil Pressure warning light will illuminate.
Volts – enter a value you wish to be warned if it is LOWER than the entered value. example: 12. When Battery Voltage is LOWER than 12, the Battery Voltage warning light will illuminate.
Coolant – enter a value you wish to be warned if it is HIGHER than the entered value. example: 215. When Coolant Temp is HIGHER than 215, the Coolant Temp warning light will illuminate.
Shift – enter a value you wish the shift light to come on. example: 6500. When engine RPM is equal to or GREATER than the value you entered, the shift light will illuminate.
Fuel PSI – enter a value you wish to be warned if it is LOWER than the entered value. example: 50. When Fuel Pressure is LOWER than 50 AND you have a User Defined Gauge configured to display FPR the gauge text will turn YELLOW indicating an issue.
Boost – enter a value you wish to be warned if it is LOWER than the entered value. example: 50. When Fuel Pressure is LOWER than 50 AND you have a User Defined Gauge configured to display FPR the gauge text will turn YELLOW indicating an issue.
AFR – enter a value you wish to be warned if it is HIGHER than the entered value. example: 14.7. When your Air/Fuel Ratio is HIGHER than 14.7 AND you have a User Defined Gauge configured to display AFR the gauge text will turn YELLOW indicating an issue.
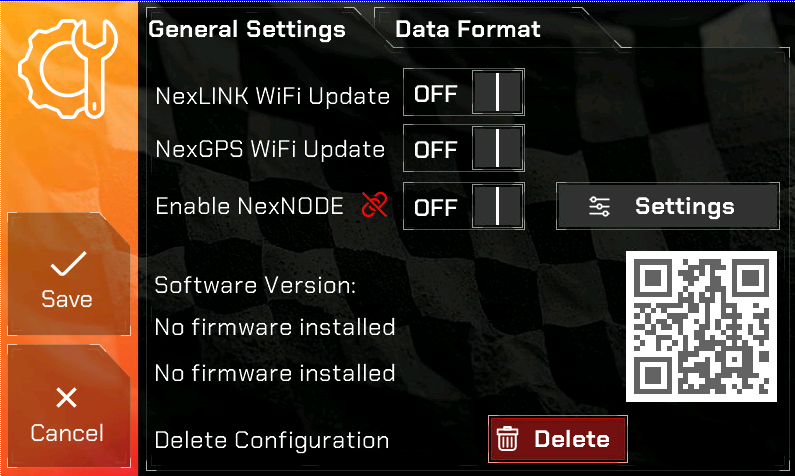
General Settings tab
NexLINK WiFi Update enables and disables wireless updates via your laptop. Please read the documentation on how to use this feature.
NexGPS WiFi Update enables and disables wireless updates via your laptop for your NexGPS hardware add-on.
Enable NexNODE enables the hardware add-on and provides the ability to configure it along with a “connect” icon to indicate connectivity between the NexLINK and the NexNODE.
NexLINK Software/Firmware version display.
Delete Config resets the Pro Edition digital dash and the NexLINK to defaults. You will be sent to the Configuration screen once you press this.
QR Code is the link to the website.
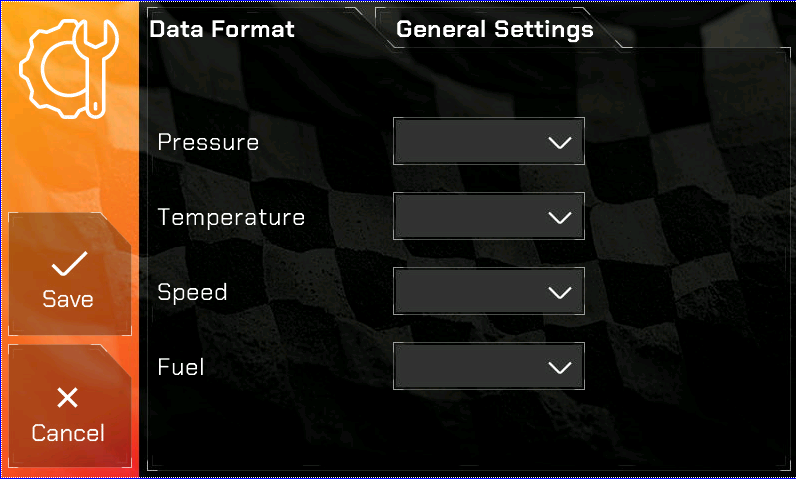
Data Format tab
User selectable units of measure. This allows you to change how data is displayed. Eg. MPH or KMH, PSI / kPa. Some datapoints will not change. If an ECU has a datapoint called Lamba, it will display as Lambda.
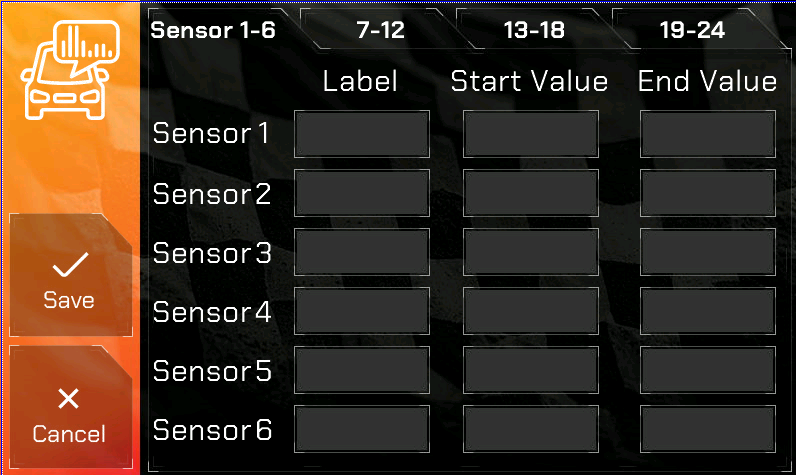
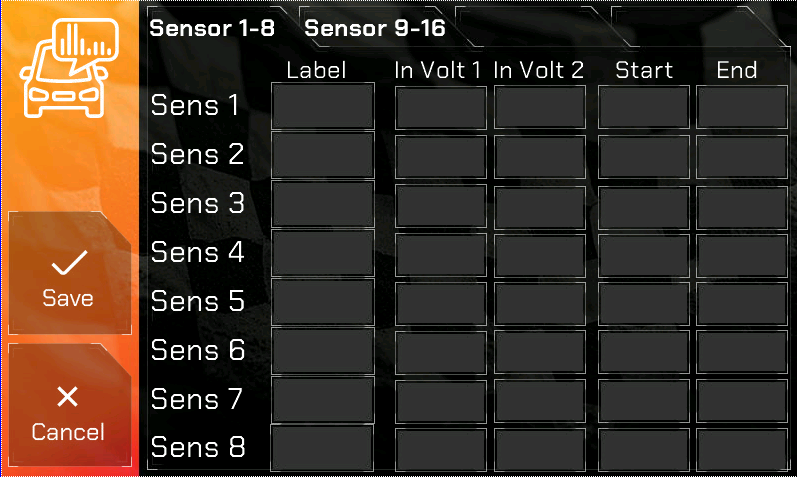
Depending on which ECU you have you will have one of these two types of Generic Sensors pages which allows you to label the Generic sensors that are sent via CANBus to the NexLINK. 4 Characters max. Please read the documentation on how to configure.

There are 5 user configurable LED lights out of the 16.
External LEDs when you purchase a Pro Edition in a case you will not enable this. If you purchase without a case you have the ability to relocate the LEDs. If the LEDs are oriented in a vertical manner then LED 5 might start on top or bottom. This flips the LEDs if enabled.
Please read the documentation on how to configure this feature.
Buttons
CANCEL – Any changes made to the configuration screen are NOT saved and the Pro Edition resets to the settings you had previously.
SAVE – Any changes made to the Configuration Screen are saved and the Pro Edition resets. Your changes should be visible on reset.