This is the only approved method for now when updating manually. Please DO NOT use another tool. If you brick the NexLINK it is not covered under warranty.
We all get in a hurry sometimes and dont read the Release Notes which can sometimes say things like “Update the NexLINK FIRST before the Display”. When that happens and is not done in the proper order that can throw things out of whack because the NexLINK and the Display firmware isn’t compatible.
No worries. The NexLINK can be updated directly with a USB C cable and your laptop or desktop. You can either remove the NexLINK from your vehicle or just plug directly into it. I would leave everything in KEY OFF when doing this.
First download the CH341 drivers here:
https://mega.nz/file/6hp3GbJQ#LTer0B7Qah3b0v59O8IAX41zxa7ZxMjTcUs5pZworKs
Extract the contents and install the driver. If you do not install the driver, the NexLINK will not be found via USB.
Once installed, plug in the NexLINK to your computer via a USB C cable.
open up your browser (Chrome, Edge or Opera) and go to this url:
https://esp.huhn.me/
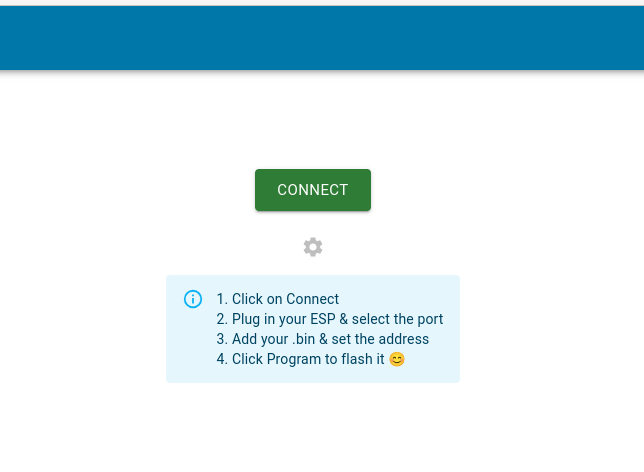
Click CONNECT.
Select the NexLINK from the popup box. It will be one of your USB devices. If you dont know which one it is, disconnect the NexLINK from your computer, click CANCEL.
You will then see the green CONNECT button again, press it and see what is in that list.
Plug the NexLINK back in and hit CONNECT again. What just popped up in the list that was not there previously is the NexLINK. Select it. If you do not see it then you did not install the drivers.

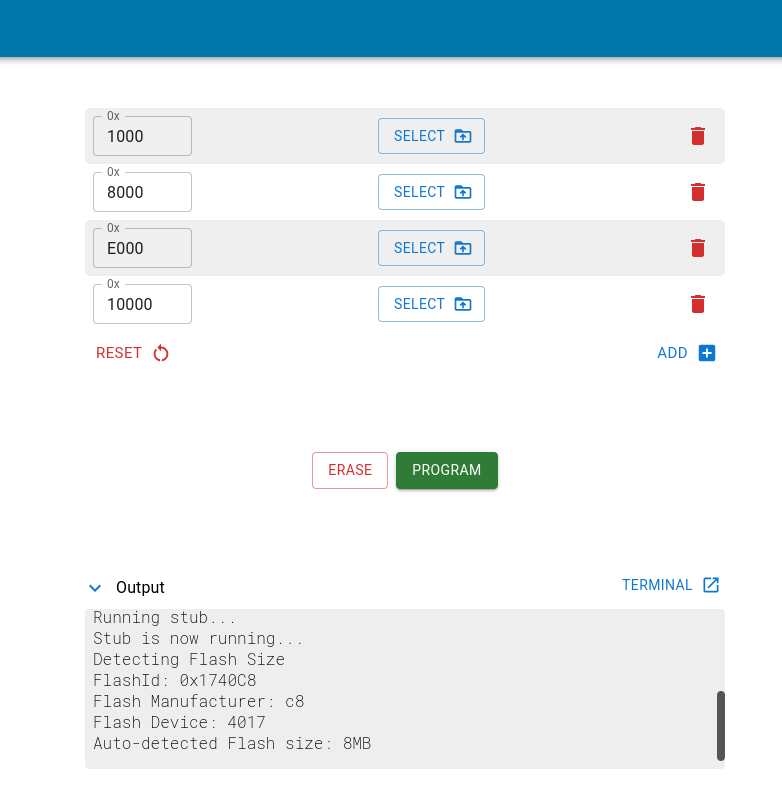
You will be at the Program menu below once you successfully CONNECT to the NexLINK.

There you will see 4 boxes which say select. Click on the SELECT which is on the SAME LINE AS THE 0x 10000 line!
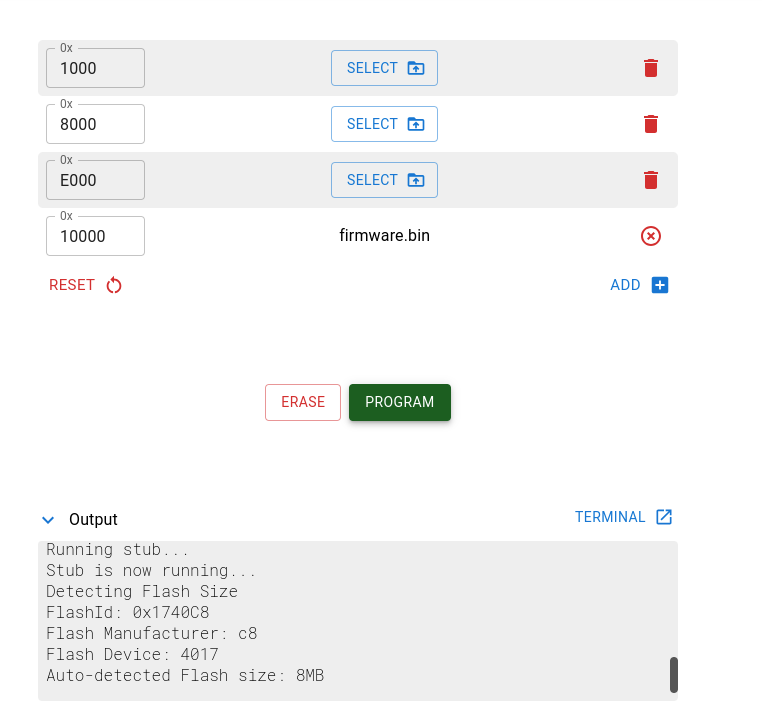
It will bring up a dialog box. Go and find the directory you extracted the NexLINK firmware update and select “firmware.bin”.
Your screen should look exactly like this:

Click PROGRAM. Let it finish. Once complete, DISCONNECT the USB CABLE from the NexLINK and then KEY OFF (if its not already OFF) and KEY ON.
